
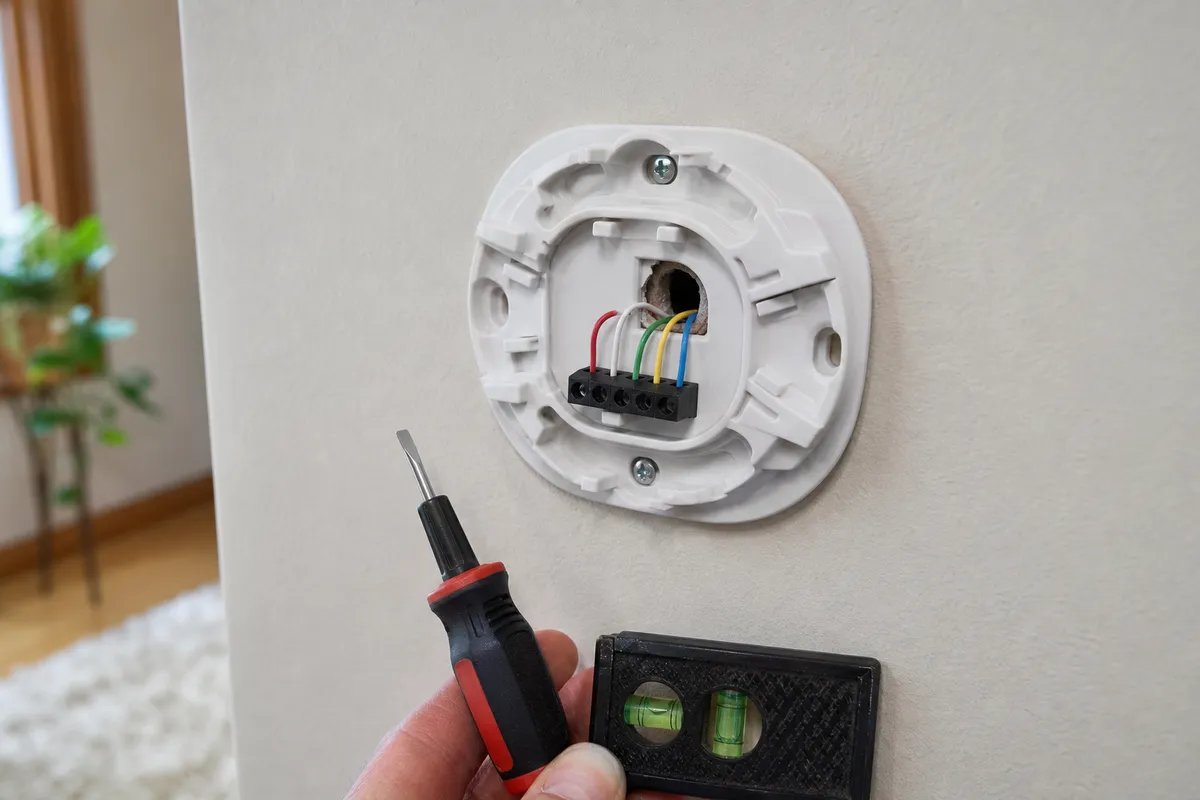
A new thermostat looks like a five-minute job. Pop off the old cover, match up some colored wires, snap in the new unit, done. I get calls every month from homeowners in Seattle, Bellevue, and Everett who started that five-minute job and ended up with a dead furnace, a tripped breaker, or a smart thermostat that won’t hold a charge. Thermostats sit at the intersection of low-voltage control wiring and your home’s electrical and HVAC systems, and that intersection is exactly where small mistakes cause real damage.
This guide walks through what’s actually involved, where the NEC and Washington L&I rules apply, and which steps are genuinely safe for a homeowner versus which ones need a licensed electrician.
TL;DR
- Most residential thermostats run on low-voltage (24V) control wiring, not household 120V/240V circuits, which is why homeowners can often handle the swap themselves.
- Turn off power at the breaker before touching any wires, even low-voltage ones, to protect your equipment’s control board.
- A missing C-wire is the number one reason smart thermostats fail or reboot randomly, not a defective unit.
- If your thermostat controls a heat pump, electric furnace, or baseboard heat, or if your panel is older than 100 amps, call a licensed electrician before you start.
- Most straightforward thermostat installs in the Seattle area run $150-$300; jobs that need new wiring or a transformer run $250-$500.
Do You Actually Need an Electrician for This?
Most conventional gas furnace or standard AC thermostats run on 24-volt control circuits, which the NEC classifies as Class 2 low-voltage wiring under Article 725. Class 2 circuits are designed with inherent current limits low enough that they don’t require a licensed electrician to install under Washington L&I rules, which is why big-box stores can sell you a smart thermostat with a “DIY-friendly” label.
That said, “doesn’t require a license” is not the same as “no risk.” Here’s where things get complicated:
- Heat pump systems often use auxiliary heat strips or reversing valves that draw on different terminals (O/B) and can be miswired to run backward, spiking your electric bill. If you’re working with a heat pump, our heat pump installation team can confirm your wiring configuration before you touch anything.
- Electric furnaces and baseboard heat frequently run on 240V circuits with the thermostat acting as a line-voltage switch, not a low-voltage signal. This is a different animal entirely and falls under general electrical work.
- Older homes in Seattle’s Ballard, Wallingford, and Wedgwood neighborhoods, along with much of the King and Snohomish county housing stock built before 1980, sometimes still run on undersized panels. If your thermostat project reveals a furnace that’s pulling more amperage than your panel was designed for, that’s a signal to look at an electrical panel upgrade rather than just swapping a thermostat.
“Photograph the old wiring before you disconnect anything — that photo answers ninety percent of the questions people call us with mid-install. And if you open the wall plate and see more than five wires, or anything that isn’t low-voltage color coding, close it back up. Line-voltage thermostats look similar and can hurt you.”
— Sergei Petrov, Founder & Lead HVAC Technician at SPS Pro Services
The Actual Step-by-Step
If you’ve confirmed you have a standard 24V system, here’s the safe order of operations.
1. Kill the power at the breaker, not only the thermostat. Even though it’s low voltage, the transformer that feeds it is powered from your household circuit. Shutting off the furnace or air handler breaker prevents a short from frying the control board while you’re working.
2. Photograph the existing wiring before disconnecting anything. Label each wire by its terminal letter (R, C, W, Y, G, O/B). Terminal letters are fairly standardized across manufacturers, but not universal, so match your photo against your new thermostat’s wiring diagram, not simply memory.
3. Check for a C-wire. This is the step most DIY installs skip and the one that causes the most callbacks. The C-wire (common) provides continuous 24V power to run a smart thermostat’s screen and Wi-Fi radio. Without it, many smart thermostats borrow power in ways that cause random reboots, blank screens, or in some cases short cycling of the furnace fan. If you don’t have a C-wire, you’ll need either a compatible add-on adapter or new cable pulled, which is a good moment to have a technician confirm your control board’s spare terminals.
4. Mount the new baseplate level, then connect wires to matching terminals. Use a small screwdriver, not force. Stripped or loose low-voltage connections are the second most common failure point.
5. Restore power and test all modes. Run heat, cooling, and fan independently before you call it done. If your system supports it, test emergency heat as well, especially on heat pump setups.
6. Set your schedule and calibrate. Most smart thermostats want two to three days to learn your patterns if they have adaptive scheduling. Don’t judge accuracy in the first 24 hours.
Common Myths I Hear on Service Calls
“All thermostats are interchangeable.” Not true. A thermostat rated for a single-stage gas furnace won’t correctly control a two-stage system or a heat pump with auxiliary heat, even if the wires physically fit the terminals.
“If it’s low voltage, it can’t cause damage.” Low voltage doesn’t mean low consequence. A shorted 24V wire can blow the transformer fuse on your furnace’s control board, and replacing that board costs far more than the thermostat did.
“Smart thermostats always save money.” They can reduce runtime with good scheduling, but a smart thermostat wired incorrectly to a heat pump can trigger the electric backup heat strips more often than necessary, which increases your bill. This is a common issue we see on service calls in Bellevue and Everett homes that switched from gas to heat pump systems without updating the thermostat logic.
Cost Comparison: Seattle-Area Thermostat Jobs
| Job Type | Typical Cost Range | Notes |
|---|---|---|
| Basic swap, existing C-wire, standard system | $150-$300 | Parts plus labor, single visit |
| Smart thermostat install, no C-wire present | $250-$450 | Includes wire fish or adapter kit |
| Thermostat replacement on heat pump with aux heat | $300-$500 | Requires confirming O/B terminal config |
| Thermostat tied to line-voltage baseboard heat | $350-$600 | Electrical work, not low-voltage only |
| Diagnostic visit only (no replacement) | $95-$150 | Applied toward repair if you proceed |
These ranges reflect typical service calls across King and Snohomish counties; exact pricing depends on wiring condition and access.
Pre-Install Safety Checklist
- Breaker for the furnace or air handler is off, confirmed with a voltage tester, not only the switch position.
- Wiring photographed and terminal letters recorded.
- Thermostat model confirmed compatible with your system type (single-stage, two-stage, heat pump, or electric furnace).
- C-wire presence checked; adapter or new wire sourced if absent.
- Panel age and amperage noted, especially in homes built before 1990.
- Furnace filter and system inspected while the panel is open, since it’s a convenient time to catch other issues before winter.
When to Stop and Call a Professional
If you open the wall plate and find more than the standard five or six low-voltage wires, if your system is a heat pump with unfamiliar terminal labeling, or if your home still has knob-and-tube or federal pacific panels, stop and call. The same goes if your thermostat project uncovers a bigger issue, like a furnace that’s short cycling on its own (a furnace repair matter) or an AC unit that isn’t cooling regardless of thermostat settings (an AC repair issue). While you have an electrician on site, it’s also a reasonable time to ask about capacity if you’re planning an EV charger installation or have noticed your water heater struggling, since a water heater repair call sometimes traces back to the same panel constraints. Homeowners in Seattle, Bellevue, and Everett with older housing stock in particular benefit from a full panel check rather than treating each appliance issue separately.
Mini FAQ
Do I need a permit to replace a thermostat in Washington State? A straightforward low-voltage thermostat swap typically doesn’t require a permit. If the job involves new line-voltage wiring or panel changes, permitting rules under Washington L&I apply and a licensed electrician should pull the permit.
Why does my new smart thermostat keep restarting? This is almost always a power supply issue, most commonly a missing or miswired C-wire, rather than a defective thermostat.
Can I install a thermostat on a heat pump myself? You can, but heat pump wiring (O/B terminals, auxiliary heat staging) is easier to get backward than on a standard furnace, and a reversed connection can run the system inefficiently for months before you notice higher bills.
If your thermostat project turns up wiring you’re not sure about, call SPS Pro Services at (206) 427-8907 and we’ll walk you through it before you flip the breaker back on.